
Building a website becomes a lot easier with the proper tools like Trello. It is a project management tool that consists of many features that are free and easy to use. Trello allows site developers to manage multiple website projects and helps employees or team members with their tasks.
Read on to learn about Trello and how to use it for project management.

What is Trello?
Trello is a project management tool wherein team members can collaborate on different projects. This tool is helpful when you want to market your website’s projects, create sales pipelines, customer service tracking, HR tracking, and more. Trello is an all-around tool and very convenient to use.

What is Trello used for?
Many people, brands, and businesses can benefit from using Trello. Groups like advertising agencies, designers, and software developers would gain so much from using this project management tool. This is because it will also enhance your productivity aside from helping you and your team be organized at work.
Apart from these, Trello may also be used as a guide that helps you stick to your production workflow. It may also help you keep track of your brand or company’s hiring process. Aside from these, you may also create and manage your brand’s development schedule with Trello. Lastly, Trello allows you to monitor your brand’s content marketing campaign.

Trello Project Management Features
Trello is very helpful for website projects because it has several project management features that could help users during the whole process of project development. These Trello features could assist you and your team members from project planning until execution.
Listed below are some of Trello’s project management features.
Automation Functions
Trello makes users’ lives easier through its automation function. This feature allows the system to do repetitive tasks automatically. All you need to do is first identify the actions regularly executed that you want to be done by the system automatically. Then you can set different rules that could trigger different actions once the system recognizes that these rules are met.
Aside from setting rules, you may also set automation functions through buttons. First, you have to pick your desired button, then add the actions you want the system to execute every time you click the button.
Card Cover Feature
Using the card cover feature, you can have visually pleasing and more organized Trello boards. This feature allows you to customize your cards by adding your desired image or changing the card’s color. You also get to choose the details you want to be shown on the card front.
Adding card covers would seem like a small change, yet it could be very helpful in managing all your website projects. The customized card covers allow you to recognize different tasks easily and help you remember all the relevant information about certain projects on your site.
Card Search
Looking for a specific card can be difficult, especially if you have too many cards on your boards because of having lots and lots of website projects. However, with Trello’s card search feature, searching for the card you’re looking for becomes much easier.
You must first type the name, labels, or users of the card on the search box at the top part of the page. Then all the related cards will appear on the page. The first to appear on the search results would be your recently created cards.
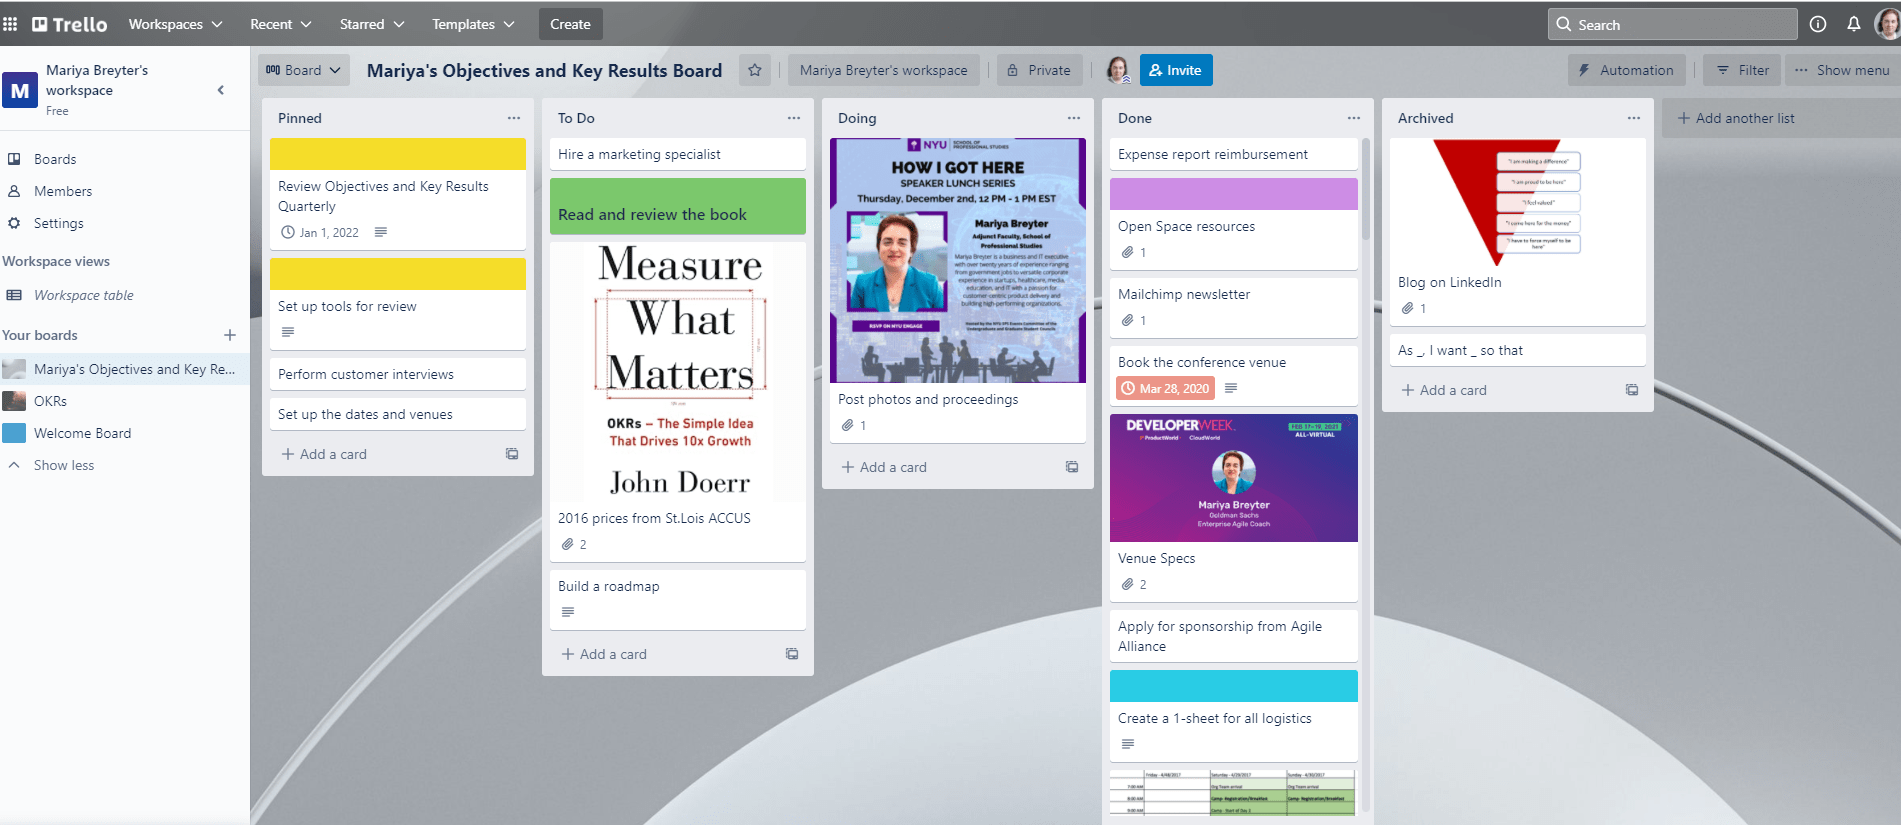
Kanban Task Management
Trello uses the Kanban visual system to manage website projects. Kanban means “visual card,” so basically, the Kanban system is all about using visual cues to keep track of your projects as you continue accomplishing your work.
Trello’s Kanban task management system allows you to access your project’s overview and keep track of your progress from time to time by showing the labels, steps, etc., on your board. Trello also uses a drag-and-drop system, so it’s easier for users to update their dashboards. Plus, once updated, Trello notifies users automatically so you would not worry about missing important tasks and instructions for your projects.
Task Card Checklists
What’s more rewarding than ticking off a task on your checklist? With Trello’s task card checklist, you can now keep track of all the tasks you’ve finished and the remaining ones you need to accomplish. It’s very easy to create checklists on Trello, and it also allows you to see your completion percentage on different projects, so it’s easy to track your progress.

How to use Trello for each step of the project management process
It might be a bit tricky to figure out your way through Trello, especially if you’re new to it. So to help you with the process, here is a guide on using Trello to manage your website projects.
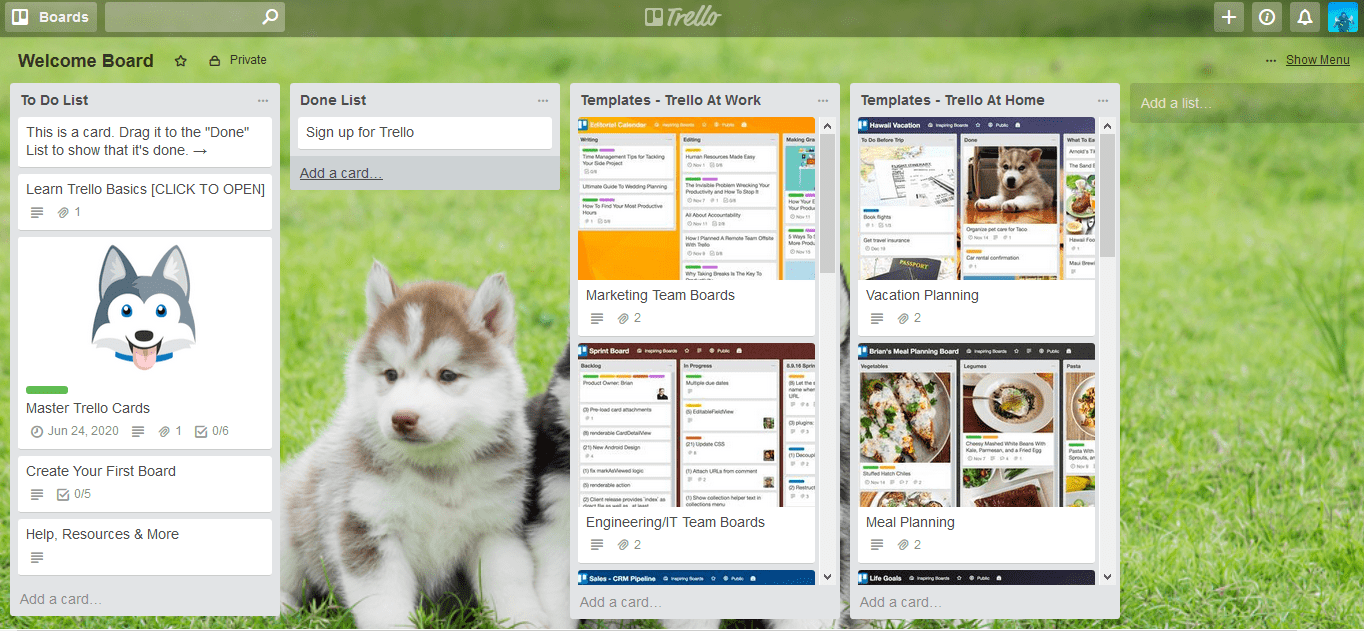
The first step is to sign up on Trello
You can go to Trello’s website by typing www.trello.com. Then if you have not yet created an account, you can sign up for free. However, you may log in directly if you already have an account. If you’re a first-time user, you will see a Personal Board tab and an option to create a new board. You click on it. Then you may start creating your first board in Trello.
The second is to create a board
Creating a board is an essential step in Trello, as it’s the first step in the process of managing your site’s projects. Once you’re already done clicking the option to create a new board, you may now customize your newly created board. You can change the name, add labels, and choose a background – it may be an image or a color. Then, if you are working in teams, choose the team member you want to give access to your board.
The third is to create your team
When working on your website projects, it is important to create a team so that everyone’s updated with all the updates and progress on your project. To create a team, you’ll simply choose the option to “create a team.” Then choose a team name and type, and write a brief description of your team.
After that, you’ll be given the option to invite your team members. Invite them as your team members by adding their email IDs. Aside from this, you may also send out an invite link. After sending the invites, you’ll have to wait for your team members to accept the invitation. Then you can start with the project.
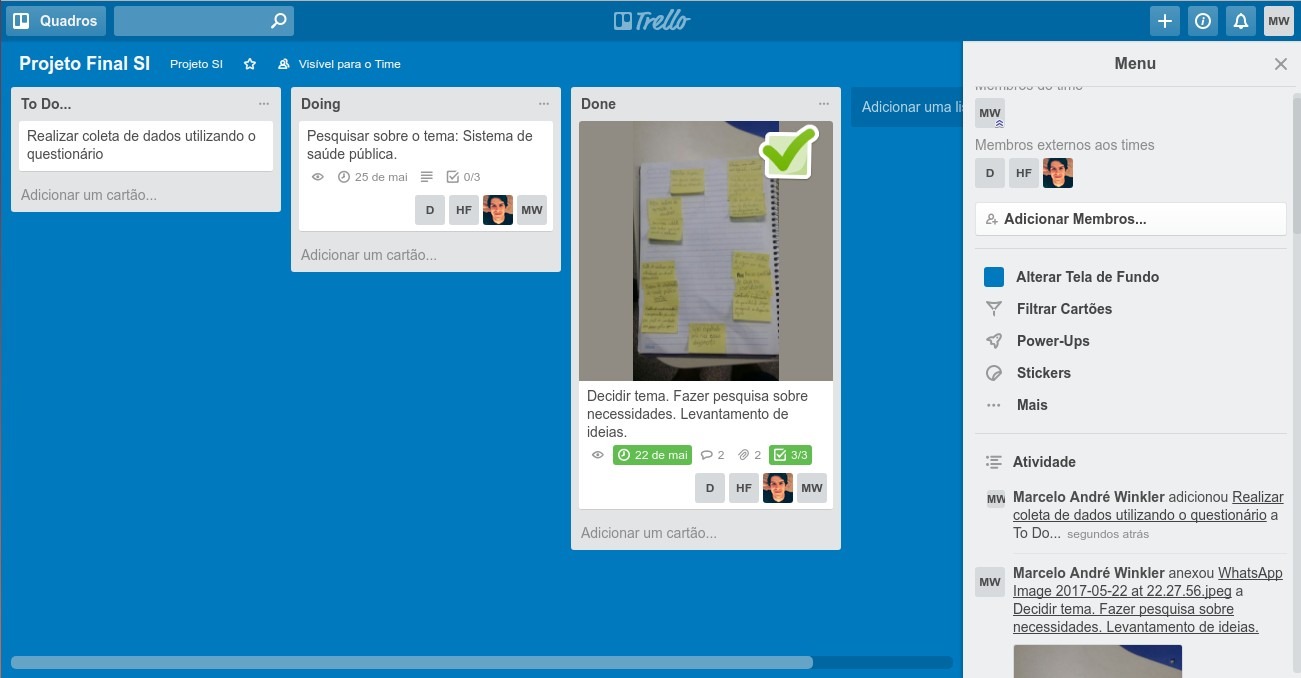
The fourth one is creating your lists
Your list depends on you and your project. You may create lists with labels like “To Do,” “Ongoing,” “Accomplished,” and the like. To create your lists, open the newly created board. Then you’ll see an option to add a list. Click on it, name your list, and add it. After you have created your list, you will see the Add a card option.
The fifth step is to add a card
Once you’ve created your list, you will see the option to add a card. Choose that option, and then you may enter a name for your card. After that, choose the Add Card option.
On your card, you may customize it the way you like. You may add background images or colors, descriptions, labels, attachments, checklists, and more.
Step six is to assign cards to your team members
You may assign each team member a card and set due dates so they’ll be reminded to finish their tasks on time. Due dates will serve as reminders for your members that they have things to accomplish. On the other hand, assigning cards to each team member will help you know who’s assigned on working a certain task. Plus, it promotes accountability among team members.
To distribute the assignment among your team members, you must first choose a card, click the “Members” button, then choose a person/persons on your team who you want to assign to the task. Then you may add due dates by clicking the “Due Date” button and selecting a date from the calendar. You may also add a time if you like.
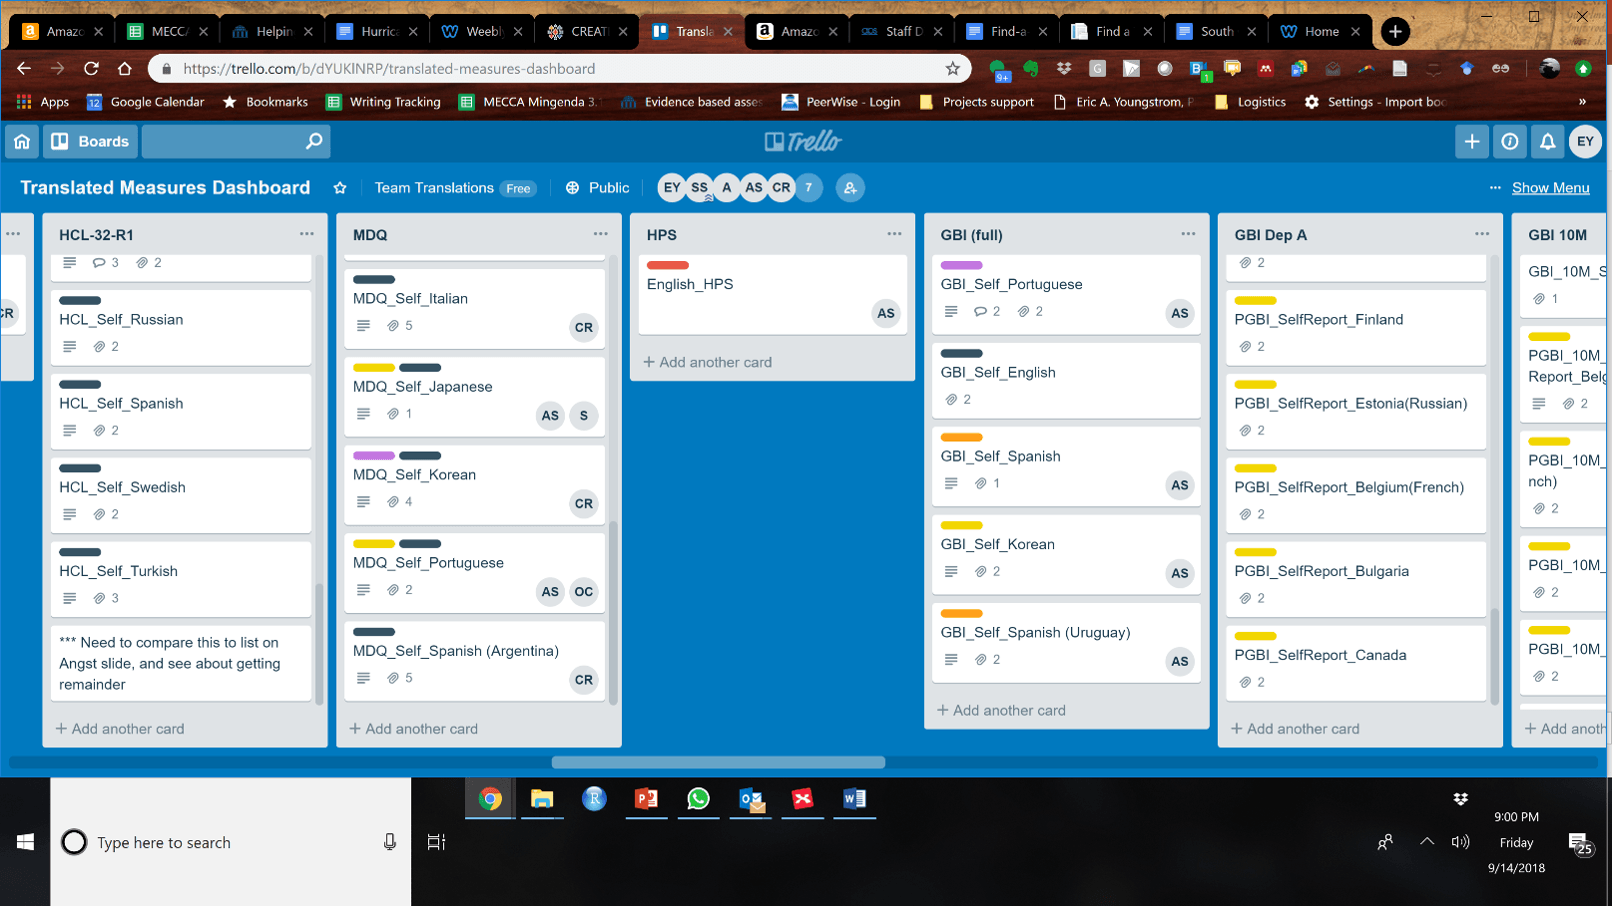
The seventh, and last step, is to label your cards
To make your tasks more organized, you may add multiple colored labels to your cards. This will help you identify the type of task and to what project the task belongs.
To add labels, all you have to do is to click on the card you want to label. Then choose the “Labels” button on the list. Select the label you want and assign each label a specific color. After adding labels, colored bars will appear on the front of the card.
Trello is a tool that makes managing website projects a lot easier. It makes work more convenient for everyone and keeps everything and everyone organized. There are different features that would be really helpful for you and your members, especially if you’re dealing with multiple website projects at once. So if you want to work more efficiently, it wouldn’t harm you to try out Trello.